
Compression on a master is a decision, not a default — and the right amount is often less than you think.
Mastering Compression: When to Use It, When to Skip It, and How to Do It Right
Most advice on mastering compression skips the first and most important question. They assume your track needs a compressor and jump straight to the settings.
The reality is more useful than that. Compression on a master is a choice, not a fixed step in the chain. Some tracks clearly benefit from it; plenty of others do not, and knowing the difference is what separates a confident master from a flat one.
This guide covers how to make that call. It then shows how to apply compression with restraint when you do reach for it, and how to hear what it is really doing.
First Question: Do You Even Need It?
Experienced engineers say this far more often than tutorials admit. A master does not automatically need a compressor. If your mix already feels cohesive and the levels sit well together, adding one can take away more than it gives.
A simple way to frame it is that mastering compression is polish, not repair. If your instruments are fighting each other or the lead vocal jumps around in volume, those are mixing problems. A compressor on the master will not fix them, and forcing it usually makes the track sound worse rather than better.
So before you open the plugin, run a quick gut check:
- Does the mix already feel glued and consistent? If it does, you can likely skip compression and go straight to limiting.
- Are the transients too sharp or spiky? A compressor with a faster attack can gently round them off.
- Does the master feel flat or low on energy? A slower attack can bring back some perceived punch and movement.
If none of those ring true, doing nothing is often the most professional choice you can make.
How to Compress a Master Without Overdoing It
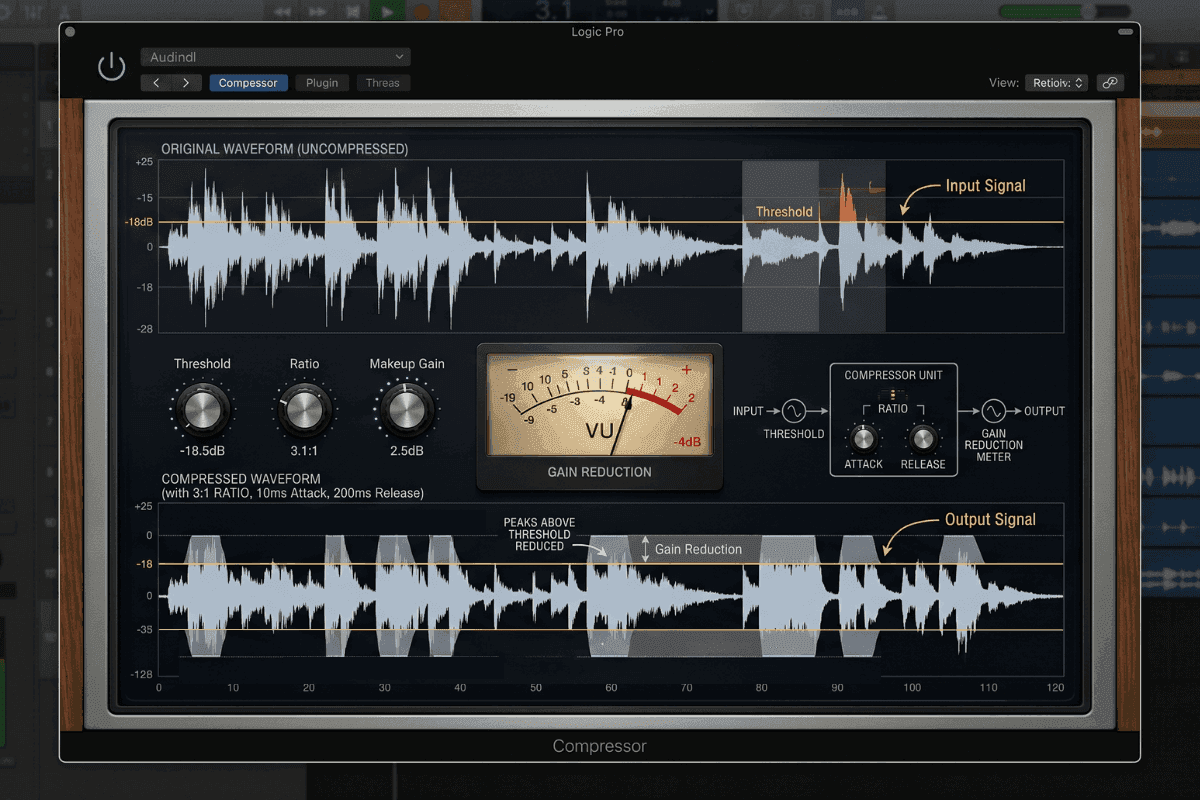
When a track does call for compression, the guiding principle is restraint. You are processing the entire mix at once, so small moves have a big effect. Here is a sensible starting point for each control and what each one does to the sound.
| Control | Where to start | What it does |
|---|---|---|
| Ratio | 1.2:1 to 2:1 | Keeps the effect gentle, since you are touching the whole mix together |
| Gain reduction | 1 to 3 dB (up to about 4 dB on dense tracks) | The actual amount of work the compressor is doing |
| Attack | 30 ms (slow) down to around 10 ms (fast) | Slow lets drum hits punch through first, fast tightens and controls them |
| Release | 100 to 300 ms, or auto | Times the recovery so the compressor breathes with the groove |
| Knee | Soft | Smooth, transparent glue rather than obvious clamping |
The two controls that change the feel most are attack and release. A slower attack of around 30 ms lets a drum transient hit before the compressor reacts, which keeps the master punchy. A faster attack of 10 ms or less grabs that transient early, which tightens things up but can dull the energy if you push it. Release works the same way in reverse. Set it too fast and the low end can pump or distort, set it too slow and the compressor stays clamped down through the next note.
One step people skip is makeup gain. After compression, match the output level to the input so your before and after comparison is honest. Louder almost always sounds better at first, so an unmatched comparison will fool you every time.
A reliable order to work in looks like this:
- Set the ratio low, around 1.5:1 to start.
- Lower the threshold slowly until the meter shows 1 to 3 dB of gain reduction.
- Adjust attack to taste, slower for punch and faster for control.
- Set release so the meter recovers in time with the music.
- Match makeup gain back to the original level.
- Bypass and compare. If you can barely hear a difference, you are either finished or you never needed it.
One more move worth knowing, for a track that wants density without the squash: parallel compression. Rather than compressing the whole mix harder, blend a heavily compressed copy underneath the original. The compressed layer adds weight and glue while the untouched signal keeps its transients and life. You get cohesion and a bigger feel without trading away the punch that sells a master.
How to Hear What Compression Is Doing
Numbers only get you so far. The skill that improves your masters is learning to hear compression, because your ears will catch problems a meter never shows. The fastest way to train this is to compare a compressed and uncompressed version at matched volume, and to notice which direction the sound moves.
There is a popular myth worth retiring here, which is that more compression equals more loudness. It does not. Past a gentle amount, over-compression mostly removes punch and life without making anything meaningfully louder.
Signs you have gone too far:
- Pumping, where the volume seems to breathe in and out with the beat
- Dull or softened transients that used to snap
- A loss of punch, where the track feels smaller instead of bigger
- Listening fatigue after a minute or two
Signs it is working well:
- The mix feels cohesive, like one piece rather than separate parts
- Dynamics feel controlled but still alive
- Energy stays consistent from section to section
- Nothing jumps out or disappears as the song plays
Compression Versus Limiting, and What Genre Changes
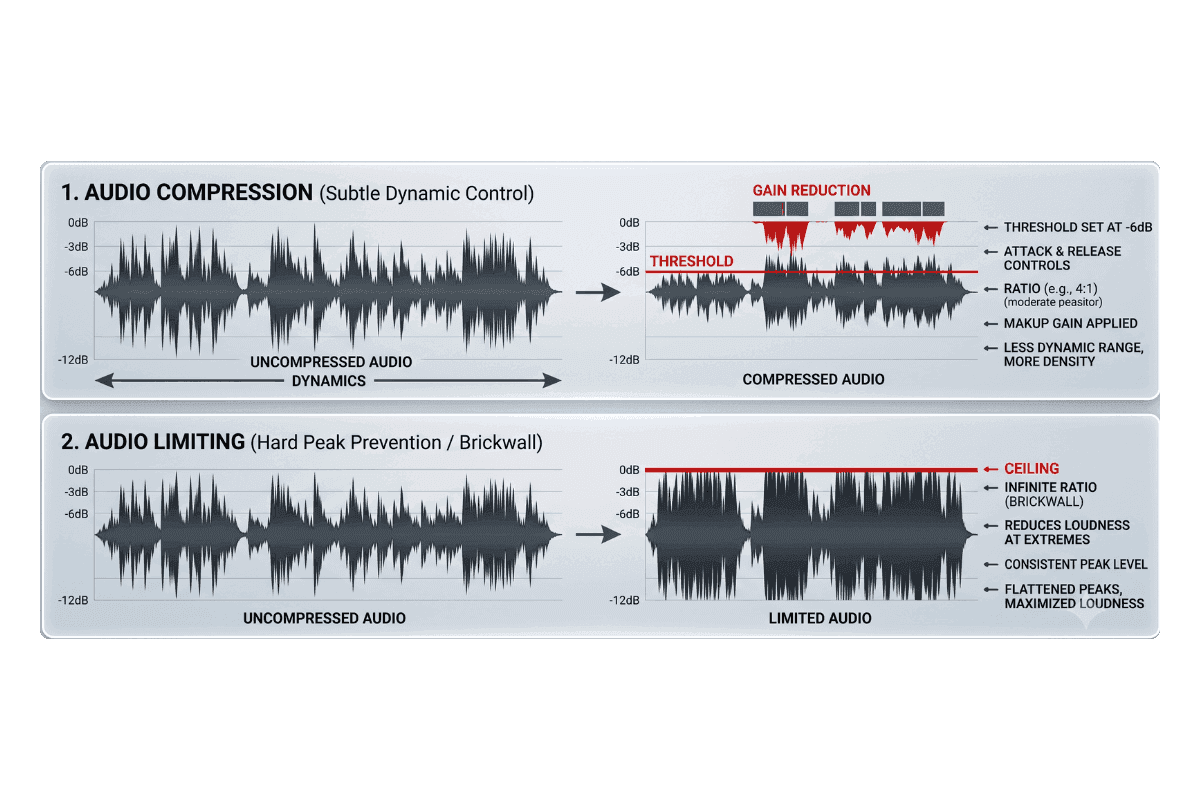
Compression and limiting often get blurred together, but they do different jobs. Compression shapes the overall dynamics and glues the mix into a whole. A limiter sits at the end of the chain to control peaks and bring the track up to its final loudness. Most of your loudness comes from the limiter, while compression is about feel and cohesion.
On the single band versus multiband question, most masters do fine on one broadband compressor. Multiband is a problem-solver, not a default. You reach for it only when one part of the spectrum, usually the low end, acts up in a way a broadband compressor cannot tame without squashing everything else.
Streaming changed the math on loudness too. Spotify normalizes playback to around -14 LUFS, and Apple Music sits near -16 LUFS. A master crushed to be extra loud just gets turned back down on playback. Push a track to roughly -6 LUFS and Spotify lowers it by about 8 dB to hit its target. The loudness war that ran from the mid 1990s until around 2015 effectively ended once platforms began doing this. What survives normalization now is punch and dynamics, which is one more reason to keep mastering compression light.
Genre still shapes how much you reach for. As a rough working guide:
| Genre | Typical gain reduction |
|---|---|
| Pop | 1 to 3 dB |
| EDM | 2 to 4 dB |
| Rock | 1 to 3 dB |
| Jazz | 0 to 2 dB |
| Classical | Often none |
Letting the Right Decision Happen for You
By now, the pattern is clear. The hard part of mastering compression was never the dB or the attack time. It is the judgment about whether to compress at all, and how far to take it. That judgment takes years of trained listening, and most people releasing music do not have that kind of time.
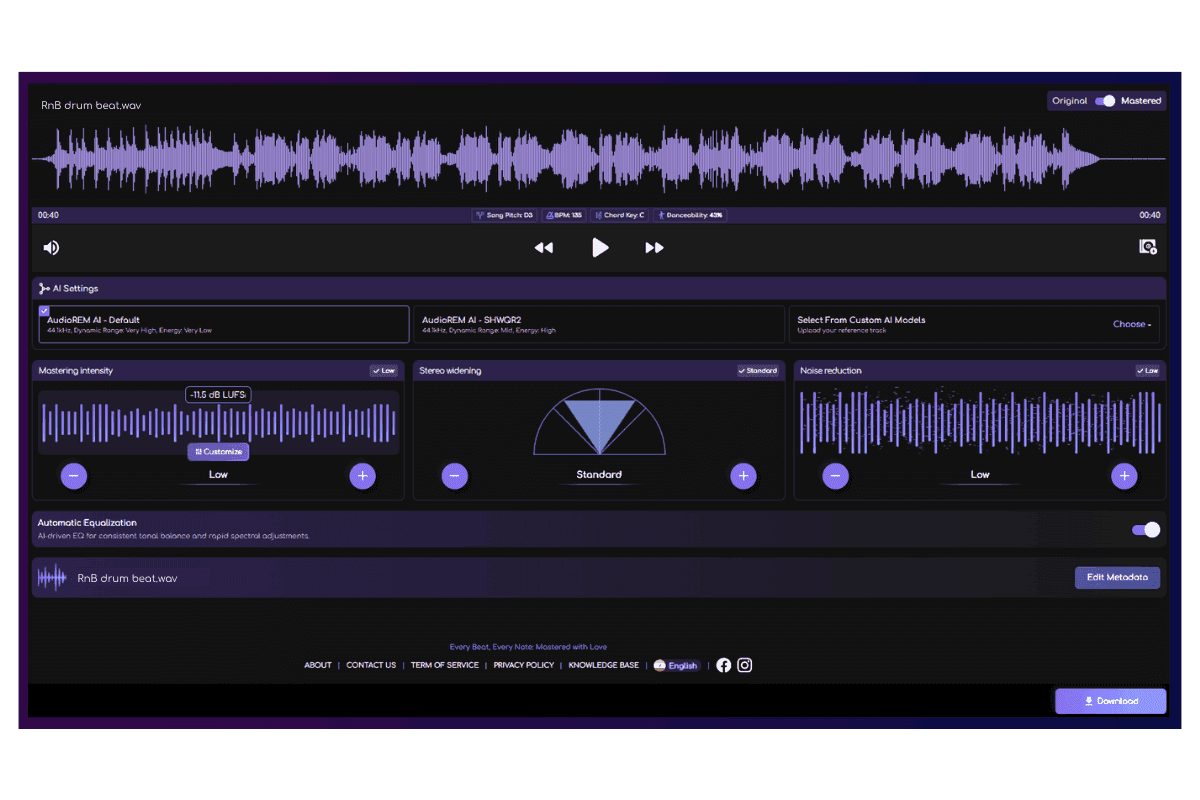
Remasterify approaches the problem the way a careful engineer would. It analyzes your specific song first, then decides whether processing is needed and how much to apply, rather than running every track through one fixed chain. Because it reads the material instead of guessing, it can hold back on a mix that is already cohesive and add support where a track really needs it.
You also stay in control of the result. A mastering intensity setting lets you choose how assertive the outcome is, so you can keep things gentle and dynamic or push for a denser sound. Reference matching lets you aim at a track whose tone and balance you admire. You get the benefit of careful compression decisions without having to make every one of them by hand.
The Best Compression Is the Kind You Never Notice
If there is one idea to keep, it is this. Great mastering compression rarely announces itself. It makes a mix feel finished and consistent while staying out of the way, and quite often the right amount is none at all. Start by asking whether your track needs it, apply it gently when it does, and trust your ears over any preset.