Recording is only half the job. The other half is what happens after you stop recording.
Why Your Voice Still Doesn't Sound Professional (And How to Fix It)
Most creators invest in the wrong end of the process. Here's what actually makes a voice sound professional — and why it happens after you stop recording.

Picture a radio station that's just slightly off frequency. The voice is there — you can hear it, you can mostly make out the words. But there's static underneath it all, a low-level friction that makes your brain work harder than it should. Most people don't consciously think “bad signal.” They just reach over and change the station.
Your voice works the same way.
You bought a better microphone. Better cables. You treated the walls, held your breath during takes, followed every YT tutorial you could find. And yet — the vocals still come back buried. Unclear. Just not quite professional.
The First Step Nobody Wants to Skip
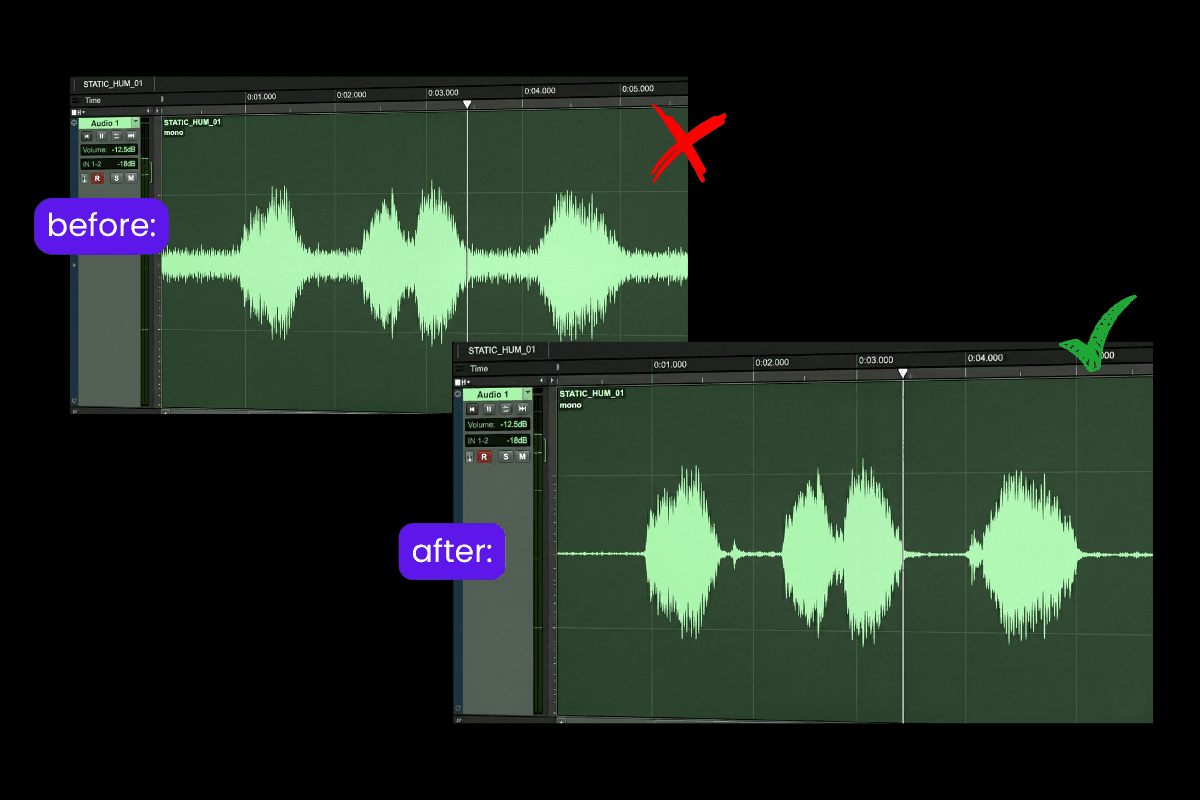
Before we get into any of this, you need to clean up the audio recording. And there's good reason to take this seriously.
According to Edison Research, 78% of podcast listeners stop listening to a show because of poor sound quality.
Think of it like painting a wall. You wouldn't skip sanding just to save time. Likewise, to begin with your voice mastering, you need clean audio.
Using noise-removal tools ensures your voice mastering starts with a clean canvas. A more detailed breakdown lives
Shape the Voice for Maximum Clarity
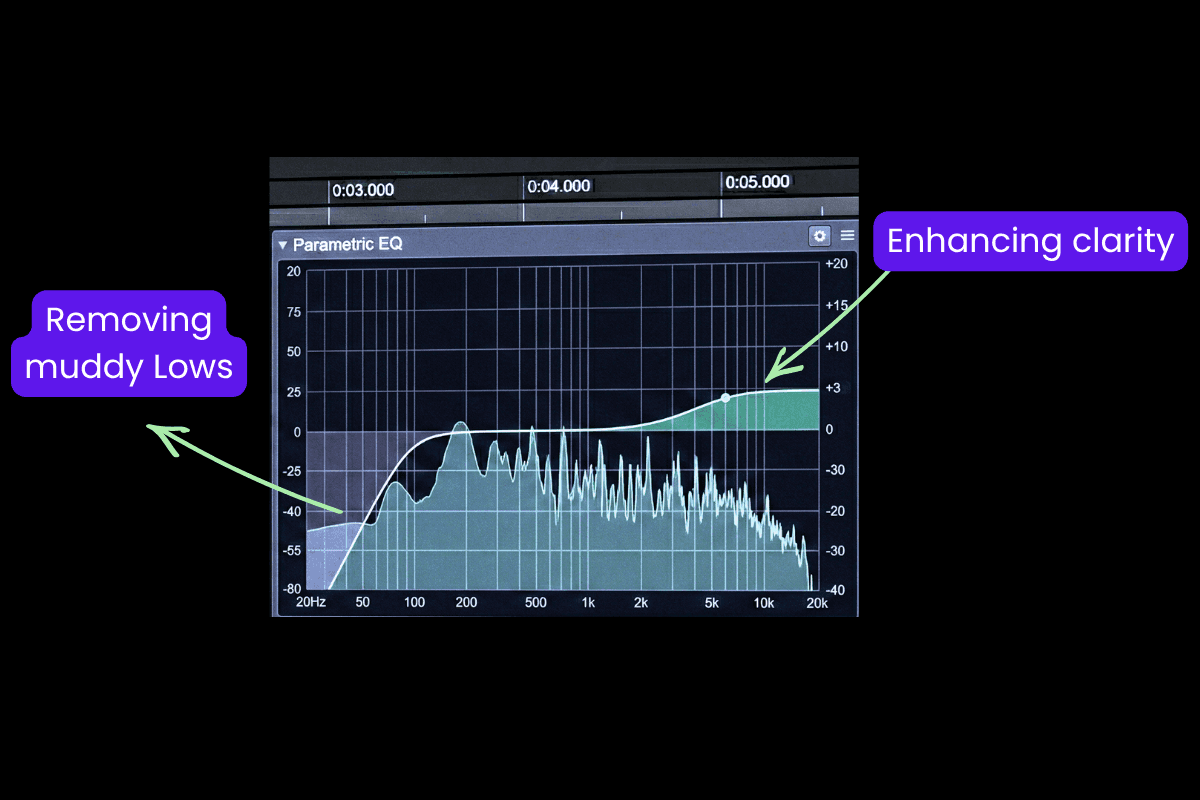
Once your voice is clean, it needs to breathe.
Without the right presence, even a clean vocal can sound like you're singing into a pillow. Muffled. Distant. Buried. And this is where EQ comes in.
Start with a high-pass filter to roll off muddy low frequencies, then nudge the highs around 3-5kHz for clarity and air. Free tools like Audacity can get you there, though expect a learning curve and trial and errors before it starts sounding right.
Control the Energy with a Vocal Compressor
Now your voice is clean and clear. But there's another thing.
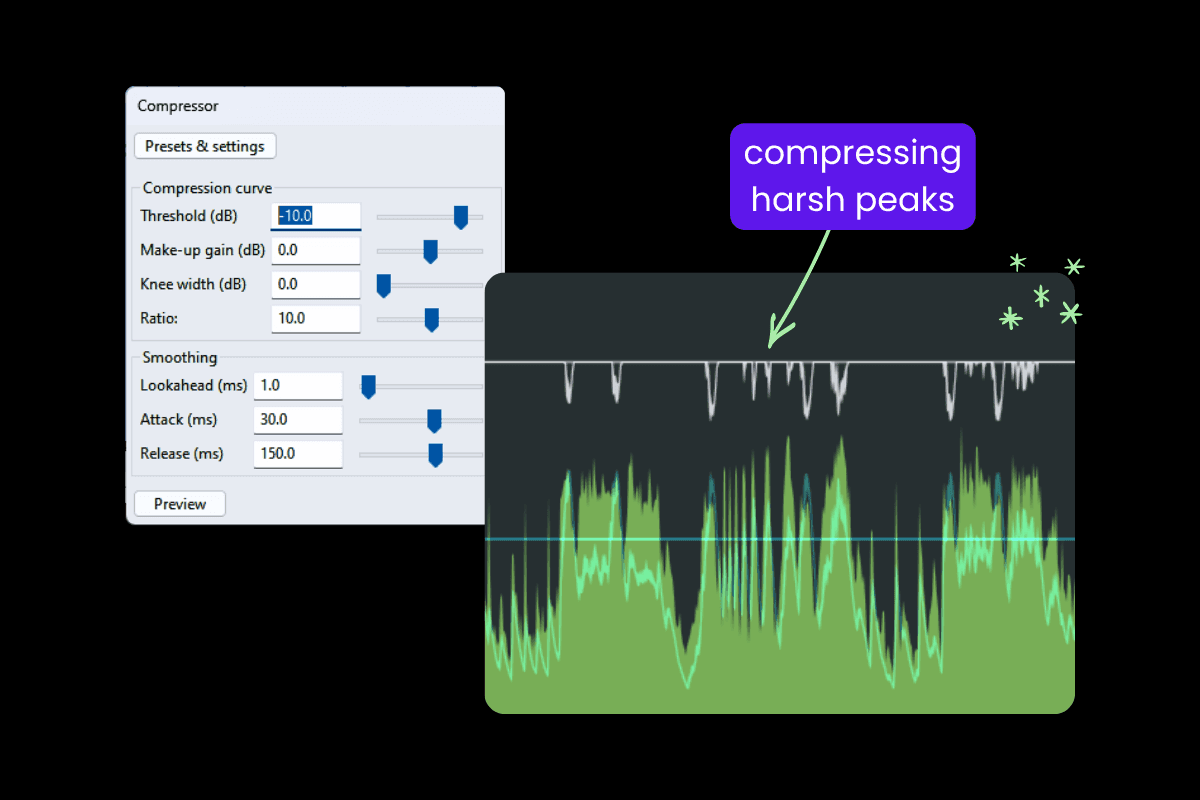
Some parts are too loud. Others are barely audible. Maybe that's your creative choice. Maybe it just happened. Either way, an inconsistent vocal pulls the listener out of the moment.
This is where a vocal compressor quietly does its job. Most DAWs come with a built-in compressor you can experiment with. As a starting point, try a ratio around 2:1 to 3:1, set the threshold so you’re getting about 3-4 dB of gain reduction on louder parts, use a medium attack (15-30 ms) to keep the natural punch of your voice, and a quick release (50-100 ms) so it recovers smoothly between phrases.
The tricky part is knowing how much is too much. Over-compress and your voice starts to feel flat and lifeless; under-compress and those jumps in volume still sneak through.
The right amount of compression keeps your voice consistent, without taking the life out of it.
A note for the technically curious
Most chart-topping vocals aren't compressed once they're compressed three times. Once at recording, once at mixing, once at mastering. Each compressor handles a small job, so no single one overdoes it. This is called serial compression, and it's why professional vocals feel both controlled and alive.
Give Your Voice More Presence
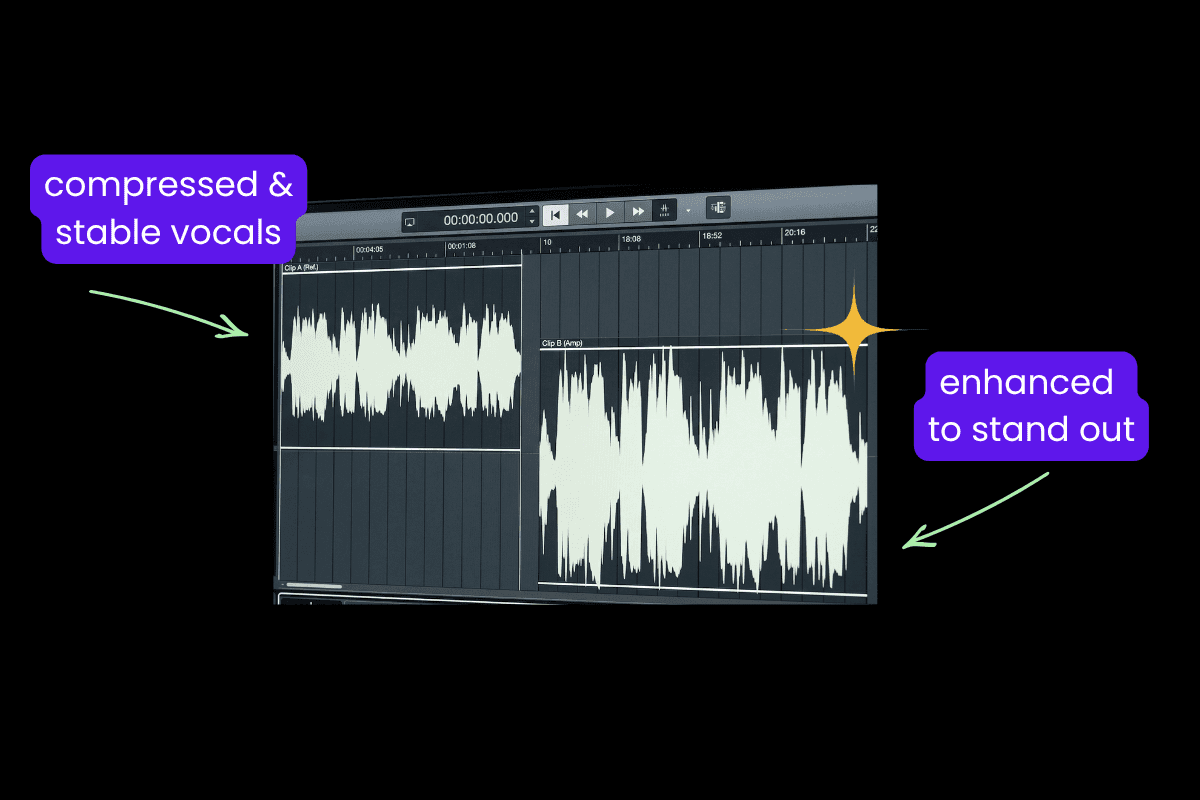
Voice Compression evened out the dynamics. Made the quieter parts loud. But now your entire voice needs one final push forward. Because if it doesn’t land instantly, it gets lost.
As Prince put it, “ If the first words out of an artist’s mouth when they hit the stage aren’t heard, you’re a horrible engineer. ”
This is where loudness maximization comes in. Raising the output gain to a safe, consistent loudness is what puts your voice front and center. A good approach is to set the limiter’s ceiling around -1 dB to avoid distortion, then increase the input or gain until your audio sits roughly between -16 to -14 LUFS for most spoken content. Not louder than everything, just present enough to actually stand out.
The result: a voice that hits the same perceived loudness as professional recordings, wherever it plays.
The Problem with Doing It Manually
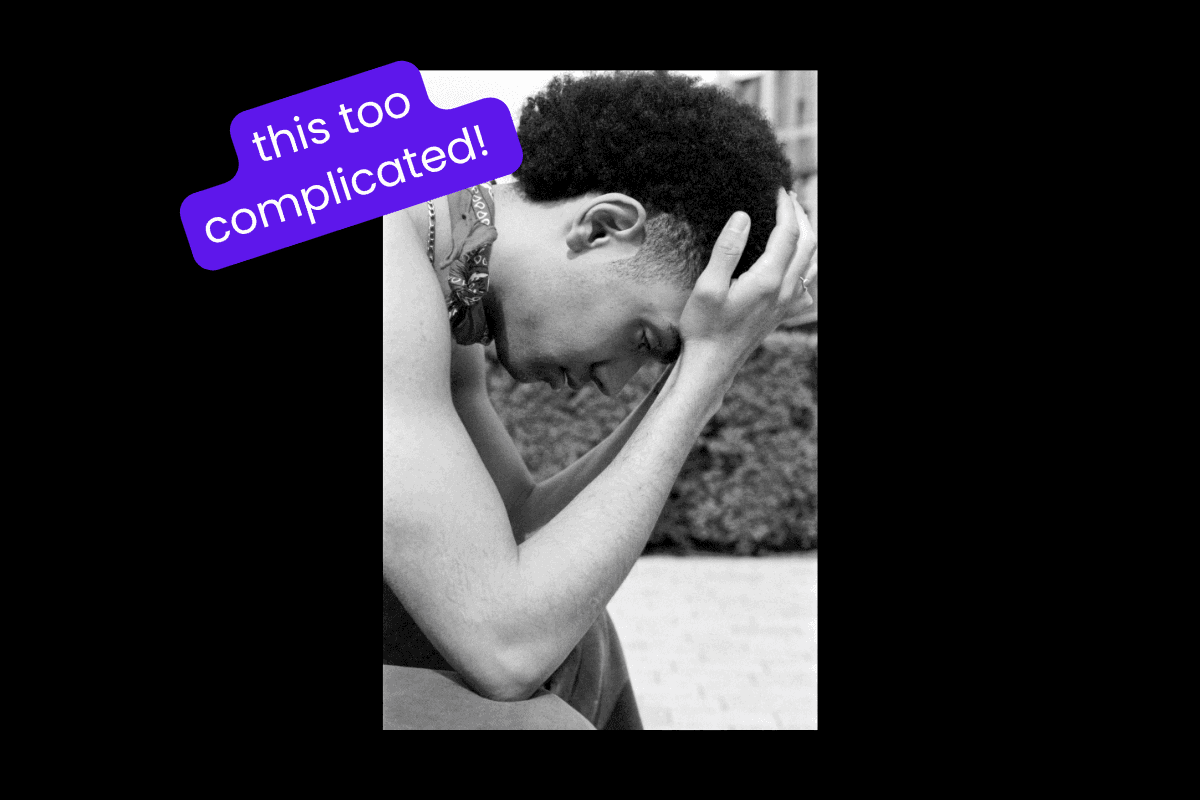
Audacity, GarageBand, Logic — these tools can technically handle everything above. The problem is they were built for people who already understand signal flow, gain staging, and the interplay between EQ and compression.
What starts as a “quick edit” often turns into hours of trial and error.
What If You Could Skip All of This?
You can spend hours tweaking best vocal chain settings, only to realize you’ve over-processed the audio and have to start over. Buying individual tools for noise reduction, EQ, and compression can be expensive, and learning the nuances of each takes significant time investment. Most people just want their voice to sound good so they can focus on creating.
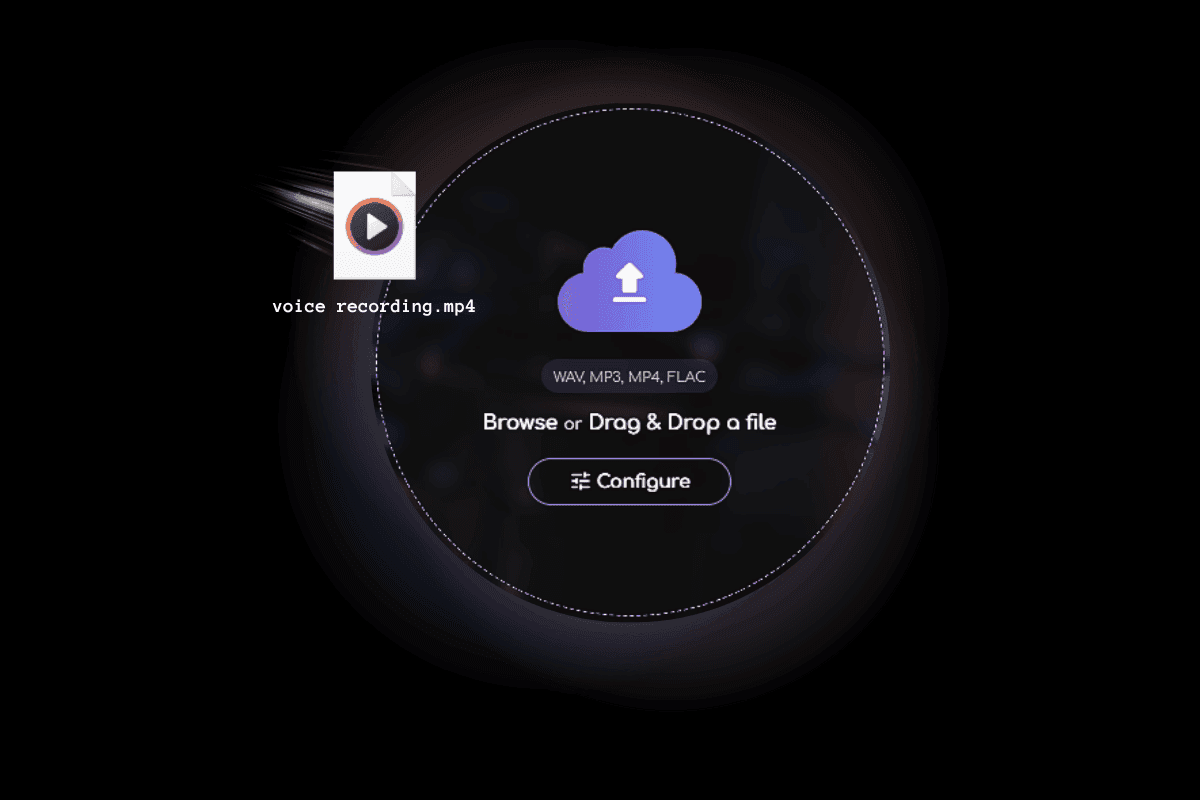
Remasterify was built for exactly this gap.
It is an online audio mastering tool that handles it all. It automatically analyses your vocal recording and applies the best voice mastering practices, noise reduction, Auto EQ, compression, and levelling. All without touching a single setting if you don't want to.
But the controls are there if you want them. Simplified enough for a beginner. Detailed enough for a professional. Everyone finds their own way in.
Hear the Difference
Original
Mastered
Here's What Creators Are Saying

Jordan M.
— Podcaster
“ I've been recording for two years and my audio never sounded quite right. Threw my last episode into Remasterify, didn't touch a single setting, and it came out cleaner than anything I've done before. ”

Jenny.G.
— Voice-Over Artist
“ I was skeptical because I'd tried other 'auto' tools and they always made things sound fake or over-processed. This one actually sounds like a human worked on it. ”

Daniel K.
— YouTube Creator
“ Not a audio person at all. I just talk into a mic and hope for the best. Remasterify is the first tool that made me stop worrying about the sound and just focus on the content. ”